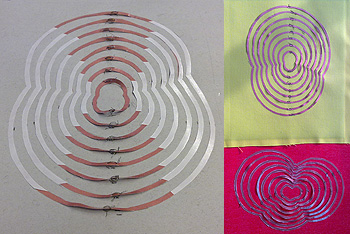
The last weeks I’ve been very busy building and testing the soft displays which use thermochromic ink.

First I did some tests with PU foil which might be UV repellent at the TU in Eindhoven. But it reduces the opacity of the ink even more. I also tried working with glue sheets to attach the conductive fabric to the back of the fluorescent fabric. That looks really nice but didn’t work on all the pieces of fabric. On the yellow fabric the two fabrics didn’t glue. With the red fabric I made some construction errors. Firstly I used spay glue to attach the strips to the foil. I shouldn’t have done that. Secondly I made the strips of foil to wide so they stuck to the cardboard on which I was working. I had to use cold glue on both instances. The way to go with this technique is:
- Glue the sheet onto the conductive fabric
- Cut out the strips on a cardboard layer (don’t use too much spay glue)
- Glue the strips to the reflective fabric
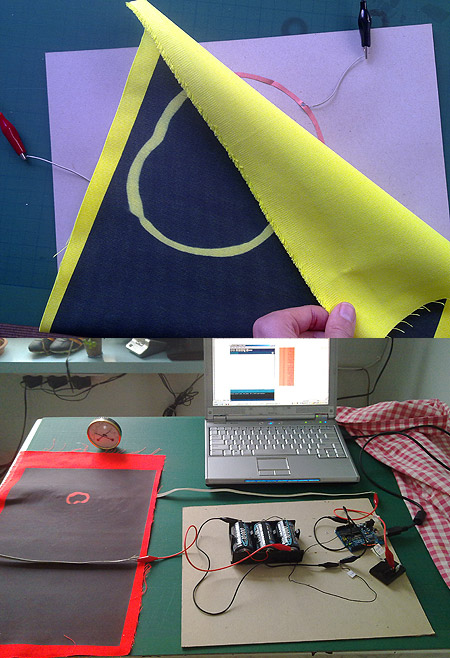
The second thing is how to attach the soft fabric to ordinary wires? I wanted to use strands of yarn but they broke even before my first experiment… The yarn deteriorates when is has been heated. I had to heat the glue foils to 150 degrees C. Yarn can’t stand that heat and so every loop (a cold test showed they were a stable connection) I made went up in flames.
So I did some research and ended up at the excellent website ‘KOBAKANT DIY Wearable Technology Documentation’ which devotes an entire chapter to connecting different materials. I discovered that it is possible to solder hard wires to fabric. It’s a nice, solid connection but now I’ve discovered the fabric sometimes doesn’t conduct evenly. I’ll try and repear that with conductive glue I’ve bought. Apparently there’s also a risk of breaking…

I’ve spend a lot of time figuring out the ampere and voltage values needed for the heating of the pieces of conductive fabric. I used two meters, one for ampere and one for voltage while I heated the fabric until it the ink dissolved. Non of the values were the same for any of the strips and the values ranged from 0,38 volt and 2 ampere for the smallest strip to 3,56 volts and 1,82 ampere for the biggest strip. The smaller strips also take far less time to heat up: 10 seconds as opposed to 40 seconds for the biggest strips.
From the above findings my engineer Paul calculated that three D-cell batteries would provide enough power. We decided to go for a constant voltage and adjustable times. This is of course critical because the fabric will burn if the Arduino software hangs. But the conductive fabric seems rather robust.
As for the times and voltages, they are a bit different when I tested with the adaptor. Now all the strips get 3,6 volt and the small ones get a couple of seconds the big ones around 40 seconds.
The ambient temperature also is of great influence on the heating time. The wearable does include a temperature sensor so I will have to read that to calculate heating times.
Finally it will take some programming to have all the strips light up at the same time because the times are so far apart.